

You can build a free business website in about 2-3 hours using website builders like Wix, Weebly, or, even if you’ve never touched a line of code. These platforms give you drag-and-drop tools, professional templates, and everything you need to get online without paying a cent upfront.
The catch? Free plans come with trade-offs. You’ll typically get a subdomain (like instead of ), see the platform’s ads on your site, and have limited storage and features. But for testing an idea, launching a side project, or getting your first digital presence, these limitations rarely matter in the beginning.
What makes free website builders work so well for beginners is that they handle all the technical stuff behind the scenes. You won’t worry about hosting, security updates, or breaking your site with bad code. You pick a template, swap in your text and images, and publish. The whole process feels more like editing a document than building a website.
This guide walks you through every step, from choosing the right platform for your needs to publishing your first page. You’ll learn what to prepare before you start, how to avoid common beginner mistakes, and when it makes sense to upgrade to a paid plan later on.
What You’ll Need to Get Started

Good news: you don’t need much to get started. Most of what you’ll use is completely free, and you probably already have some of these items ready.
Here’s everything you should gather before you begin:
- A working email address for account registration and receiving notifications
- Basic business information like your business name, description, and what you offer
- Photos of your products, services, or business location (even smartphone photos work)
- Your contact details including phone number and business address if applicable
- About 2-3 hours of uninterrupted time to build your initial site
You won’t need any coding skills or technical expertise. The platforms we’ll cover are built specifically for beginners, with drag-and-drop editors that work like arranging items on a digital page.
As for the website builder itself, you’ll choose one during the process. Popular free options include Wix, Google Sites, and Weebly. Each offers free plans with different features, and we’ll help you pick the right one for your business in the next sections.
One thing to note: while you can build your site completely free, you’ll likely get a subdomain rather than a custom one. This means your address will look like “” instead of “”. That’s perfectly fine for starting out, and many small businesses successfully use free subdomains. You can always upgrade to a custom domain later if you want.
Think of this like assembling furniture. You need the right pieces laid out before you start, but the actual building process is straightforward once everything’s ready.
Important Considerations Before You Begin

Before you dive into building, understand what you’re signing up for. Free website builders don’t charge money, but you’ll pay in other ways: your site will display the platform’s branding (usually ads or a banner saying “Built with [Platform Name]”), you’ll get a subdomain instead of a professional custom domain (like rather than ), and storage space is limited, often just a few hundred megabytes.
Read the terms of service before you start. Some free plans restrict commercial use, prohibit certain business types, or claim rights to content you upload. Always back up your site regularly, download your text, images, and any files you create, because if something goes wrong or you decide to move later, you’ll want copies. Free tiers typically don’t include advanced web development technologies like custom code, third-party integrations, or SEO tools, so if your business grows, you might hit a ceiling.
Think of a free website as a starting point, not a forever solution. It gets you online quickly, but be prepared to upgrade to a paid plan when you need more control, better branding, or additional features.
Choosing Your Free Website Platform
The free website builder you choose will shape your entire website experience, so it’s worth spending a few minutes to pick the right one for your business. Don’t worry, there are no wrong choices here, and you can always switch later if needed.
Wix stands out as the most beginner-friendly option. You’ll get access to hundreds of professionally designed templates specifically for businesses, and the drag-and-drop editor lets you place elements exactly where you want them. The free plan includes 500 MB of storage and bandwidth, which works well for small business sites with 5-10 pages. The trade-off is that Wix ads appear on your site, and you’ll use a Wix-branded subdomain like “.”
(different from ) offers more flexibility and looks more professional because it doesn’t display prominent platform branding. You get 1 GB of storage and can choose from business-focused themes. However, the interface has a steeper learning curve, and the free plan restricts many customization options. This works best if you’re comfortable spending time learning the system or plan to upgrade eventually.
Google Sites wins for simplicity and speed. You can build a basic business site in under an hour, and it integrates seamlessly with Google tools you might already use. The downside is limited design options, your site will look clean but fairly generic. It’s ideal for service businesses that need a simple online presence quickly, like consultants or local contractors.
Weebly balances ease of use with decent features. The editor feels intuitive, and you get e-commerce capabilities even on the free plan (though with transaction fees). Storage tops out at 500 MB.
For most beginners building their first business site, Wix provides the best combination of design flexibility and ease of use. Choose Google Sites if you value simplicity over customization, or if you’re willing to invest time learning a more powerful platform.
Building Your Website: Step-by-Step Process
Step 1: Create Your Account and Choose a Template
Creating your account takes just a few minutes. Head to your chosen platform’s website and click the “Sign Up” or “Get Started” button. You’ll need to enter your email address and create a password. Some platforms like Wix also ask for basic details about your business type upfront.
Once you’re in, you’ll see a gallery of templates. Don’t spend hours browsing, you can change templates later if needed. Look for categories like “Business,” “Services,” or your specific industry (restaurants, consultants, retail shops). Preview two or three options to see their layouts.
Pick a template that matches how you want to organize information. If you sell products, choose one with clear product showcase areas. For service businesses, look for templates emphasizing your expertise and contact information prominently.
Most platforms let you start with a blank canvas, but templates save hours of work. They’re professionally designed and give you a solid starting structure. You’ll customize everything in the next steps, so focus on finding a layout that feels right for your business type rather than worrying about exact colors or images.
Step 2: Customize Your Website Design
Once you’ve chosen your template, it’s time to make the site reflect your business identity. Most free platforms let you customize design elements through a simple point-and-click interface, no coding required.
Start with your color scheme. Pick two or three colors that represent your brand (your logo colors work well here). Look for the “Design” or “Styles” section in your builder’s menu. You’ll typically find options to change background colors, text colors, and button colors. Stick to your chosen palette throughout the site for a cohesive look.
Next, adjust the fonts. Free platforms offer dozens of typeface options. Choose one readable font for body text and optionally a second, complementary font for headings. Avoid using more than two fonts, it looks cluttered.
Now tackle images. Replace template placeholder photos with your own business images. Upload your logo first (usually in the header area), then add photos of your products, services, or team. Most builders accept common formats like JPG and PNG. If you don’t have professional photos yet, free stock image sites like Unsplash or Pexels offer business-appropriate options.
Finally, rearrange the layout if needed. Drag-and-drop editors let you move sections, add or remove blocks, and adjust spacing. Understanding website design basics helps, but these visual editors make it intuitive. Keep your layout clean, whitespace helps visitors focus on your message.
Preview your changes frequently to see how everything looks together.
Step 3: Add Your Essential Business Pages
Now you’ll create the pages that form the backbone of your business website. Most free website builders let you add pages through a simple menu or dashboard option, look for buttons labeled “Add Page,” “Pages,” or a similar option in your editor.
Every business website needs these four core pages as a minimum:
- HomeYour front door that tells visitors who you are and what you do in one or two clear sentences
- AboutThe story behind your business, why you started it, and what makes you different from competitors
- Services or ProductsA straightforward description of what you’re selling, with prices if appropriate
- ContactHow customers can reach you, including at least one reliable contact method
Start by adding these pages one at a time. When you create each page, give it a clear, simple name that matches what visitors expect to find. Your Home page is usually created automatically, so focus on adding the other three first.
For your Home page, write a headline that immediately tells visitors what your business does. Follow it with two or three short paragraphs explaining your main offering and why someone should choose you. If you’ve mapped out a concept web during planning, refer back to it now to ensure your pages align with your original vision.
Your About page should feel personal without being lengthy. Include when you started, what problem you solve for customers, and any relevant credentials or experience. Two to four paragraphs work well here.
The Services or Products page needs the most detail. List what you offer with brief descriptions, and consider adding images if your platform allows them easily.
Step 4: Write and Format Your Content
Your website’s content is what convinces visitors to trust and choose your business. Write in a natural, conversational way, as if you’re explaining your services to a customer face-to-face. Keep sentences short and break up text into small paragraphs, two or three sentences max, so people can scan quickly on any device.
Start each page with the most important information first. On your homepage, immediately explain what you do and who you help. On your services page, list benefits before features. Most free website builders let you add headings, bullet points, and bold text to organize information. Use headings to separate main topics, bullets to list key points or features, and bold to emphasize important details like prices or contact methods.
Avoid business jargon and complicated industry terms. If you must use technical language, explain it in plain English. While you don’t need to know how to write a webpage from scratch, understanding basic formatting helps. Include clear calls to action on every page, tell visitors exactly what to do next, whether that’s calling you, filling out a form, or browsing your products.
Step 5: Add Contact Information and Forms
Your contact information is the bridge between your website and real customers, so make it easy to find and use. Most free website builders let you add contact details in multiple places, your footer, header, or a dedicated Contact page.
Start by adding your business phone number, email address, and physical location if you have one. Click “Add element” or “Insert” in your editor, then look for “Contact Info” or “Text” blocks. Type your details clearly, no fancy formatting needed.
For contact forms, find the “Form” or “Contact Form” element in your builder’s menu. Drag it onto your page. The basic form typically includes fields for name, email, and message. That’s enough for most small businesses. Configure where form submissions should be sent (usually your business email), and test it by sending yourself a message. If it arrives, you’re set.
Pro tip: Don’t hide your contact info. Put at least an email or phone number in your site footer so it appears on every page.
Step 6: Optimize for Mobile Devices
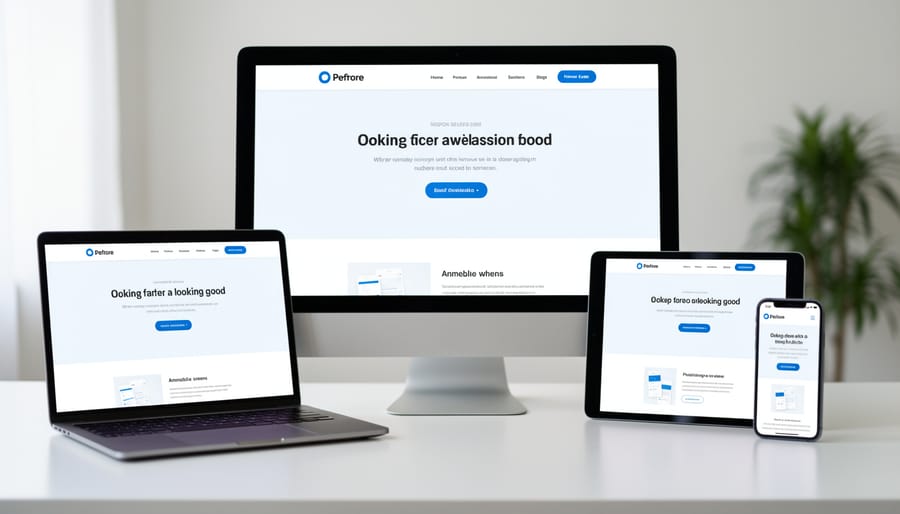
Most free website builders automatically create a mobile version of your site, but you still need to check it looks good. Click your platform’s mobile preview button (usually a phone icon in the editor) to see how pages appear on smaller screens.
Look for text that’s too small to read, images that overlap, or buttons too tiny to tap easily. Many builders let you adjust mobile layouts separately from desktop, resize elements, reposition sections, or hide content that crowds the screen.
Test your contact forms and navigation menu on an actual phone if possible. Scroll through each page. If you spot awkward spacing or cut-off text, go back to the editor and tweak those elements until everything displays cleanly on both desktop and mobile views.
Publishing and Verifying Your Website
Before clicking that publish button, take a moment to review your work. Open every page in preview mode and click through your entire site as if you’re a customer visiting for the first time. Check that all your images display properly, your text reads clearly, and nothing looks broken or out of place.
Test your contact form by submitting a test inquiry yourself. You should receive the submission in your email within a few minutes. If you don’t, revisit your form settings to make sure the correct email address is connected. Click every link on your site, including your social media icons and any external links to verify they go to the right destinations.
When everything checks out, find the publish button, which is usually in the top right corner of your website builder. Most platforms will ask you to confirm your site address one last time before going live. Click publish and wait for the confirmation message.
Once published, open a private or incognito browser window and visit your website URL to see exactly what the public sees. This eliminates any caching issues that might show you an older version. Pull out your phone and visit your site there too. Tap buttons, fill out the contact form again, and make sure everything functions smoothly on a smaller screen.
Try searching for your exact business name and website URL in Google after 24 hours to confirm your site is accessible. If it doesn’t appear immediately, that’s normal. Search engines need time to discover new websites, but your site is live and anyone with your URL can visit it right away.
What to Do After Your Site Goes Live
Congratulations! Your website is live and ready for visitors. Now let’s make sure people can actually find it.
Your first priority is getting your site indexed by search engines. Visit Google Search Console () and submit your website URL. This tells Google your site exists and helps it appear in search results within a few days. Do the same with Bing Webmaster Tools if you have time.
Next, claim and update your Google Business Profile. Go to and add your website URL to your existing profile, or create a new one if you don’t have one yet. This connects your website to your local business listing and helps customers find you in Google Maps and local searches.
Share your website everywhere your business appears online:
- Update your social media bios with your new website URL
- Add the link to your email signature
- Include it on business cards and printed materials
- Post an announcement on your social channels
- Add it to any directory listings you’re already in
Set aside 30 minutes each month for basic maintenance. Check that all your contact forms still work by sending yourself a test message. Update any seasonal information or prices that have changed. Add new photos or update content about your latest products or services. Keep your site fresh, and you’ll keep visitors coming back.
Common Questions About Building Free Business Websites
Can I use my own domain name with a free website?
Most free plans include a subdomain (like ), but you can’t use a custom domain without upgrading to a paid plan. However, you can purchase a domain separately and point it to your free site on some platforms, though features may be limited.
Will my free website look professional enough for a real business?
Yes, free websites can look professional with modern templates and careful design choices. The main giveaway is typically the platform branding and subdomain URL, but your content quality and design matter more to visitors than whether you paid for hosting.
Can I upgrade to a paid plan later without rebuilding everything?
Absolutely. All major platforms let you upgrade seamlessly, keeping your entire website intact. You’ll gain features like a custom domain, more storage, and removal of platform ads while maintaining your existing design and content.
Will search engines like Google find my free website?
Free websites can appear in search results, though some free plans have limited SEO tools compared to paid options. You can still optimize your content, add page titles and descriptions, and submit your sitemap to Google Search Console to improve visibility.
Beyond these common concerns, many beginners worry about storage limits on free plans. Most platforms offer enough space for a basic business site with several pages and images, but if you plan extensive photo galleries or downloadable resources, you’ll hit those limits faster. The good news is that you can always optimize images before uploading and delete unused files to maximize your available space.
Another question that comes up frequently: what happens if you stop using a free website builder? Your site typically remains online as long as you log in periodically (requirements vary by platform), but extended inactivity might lead to account closure. Always download backups of your content and images so you’re not starting from scratch if you switch platforms later.
You now have everything you need to build a professional business website without spending a penny. The process might have seemed overwhelming at first, but by breaking it down into simple steps, choosing a platform, selecting a template, adding your content, and publishing, you’ve seen it’s completely achievable, even if you’ve never built a website before.
The best part? You can start right now. Pick a free website builder that matches your needs, set aside an hour or two, and work through the steps at your own pace. Your business deserves an online presence, and you don’t need technical skills or a big budget to create one. Every successful website started with someone clicking “Get Started” for the first time. Make today that day for your business.